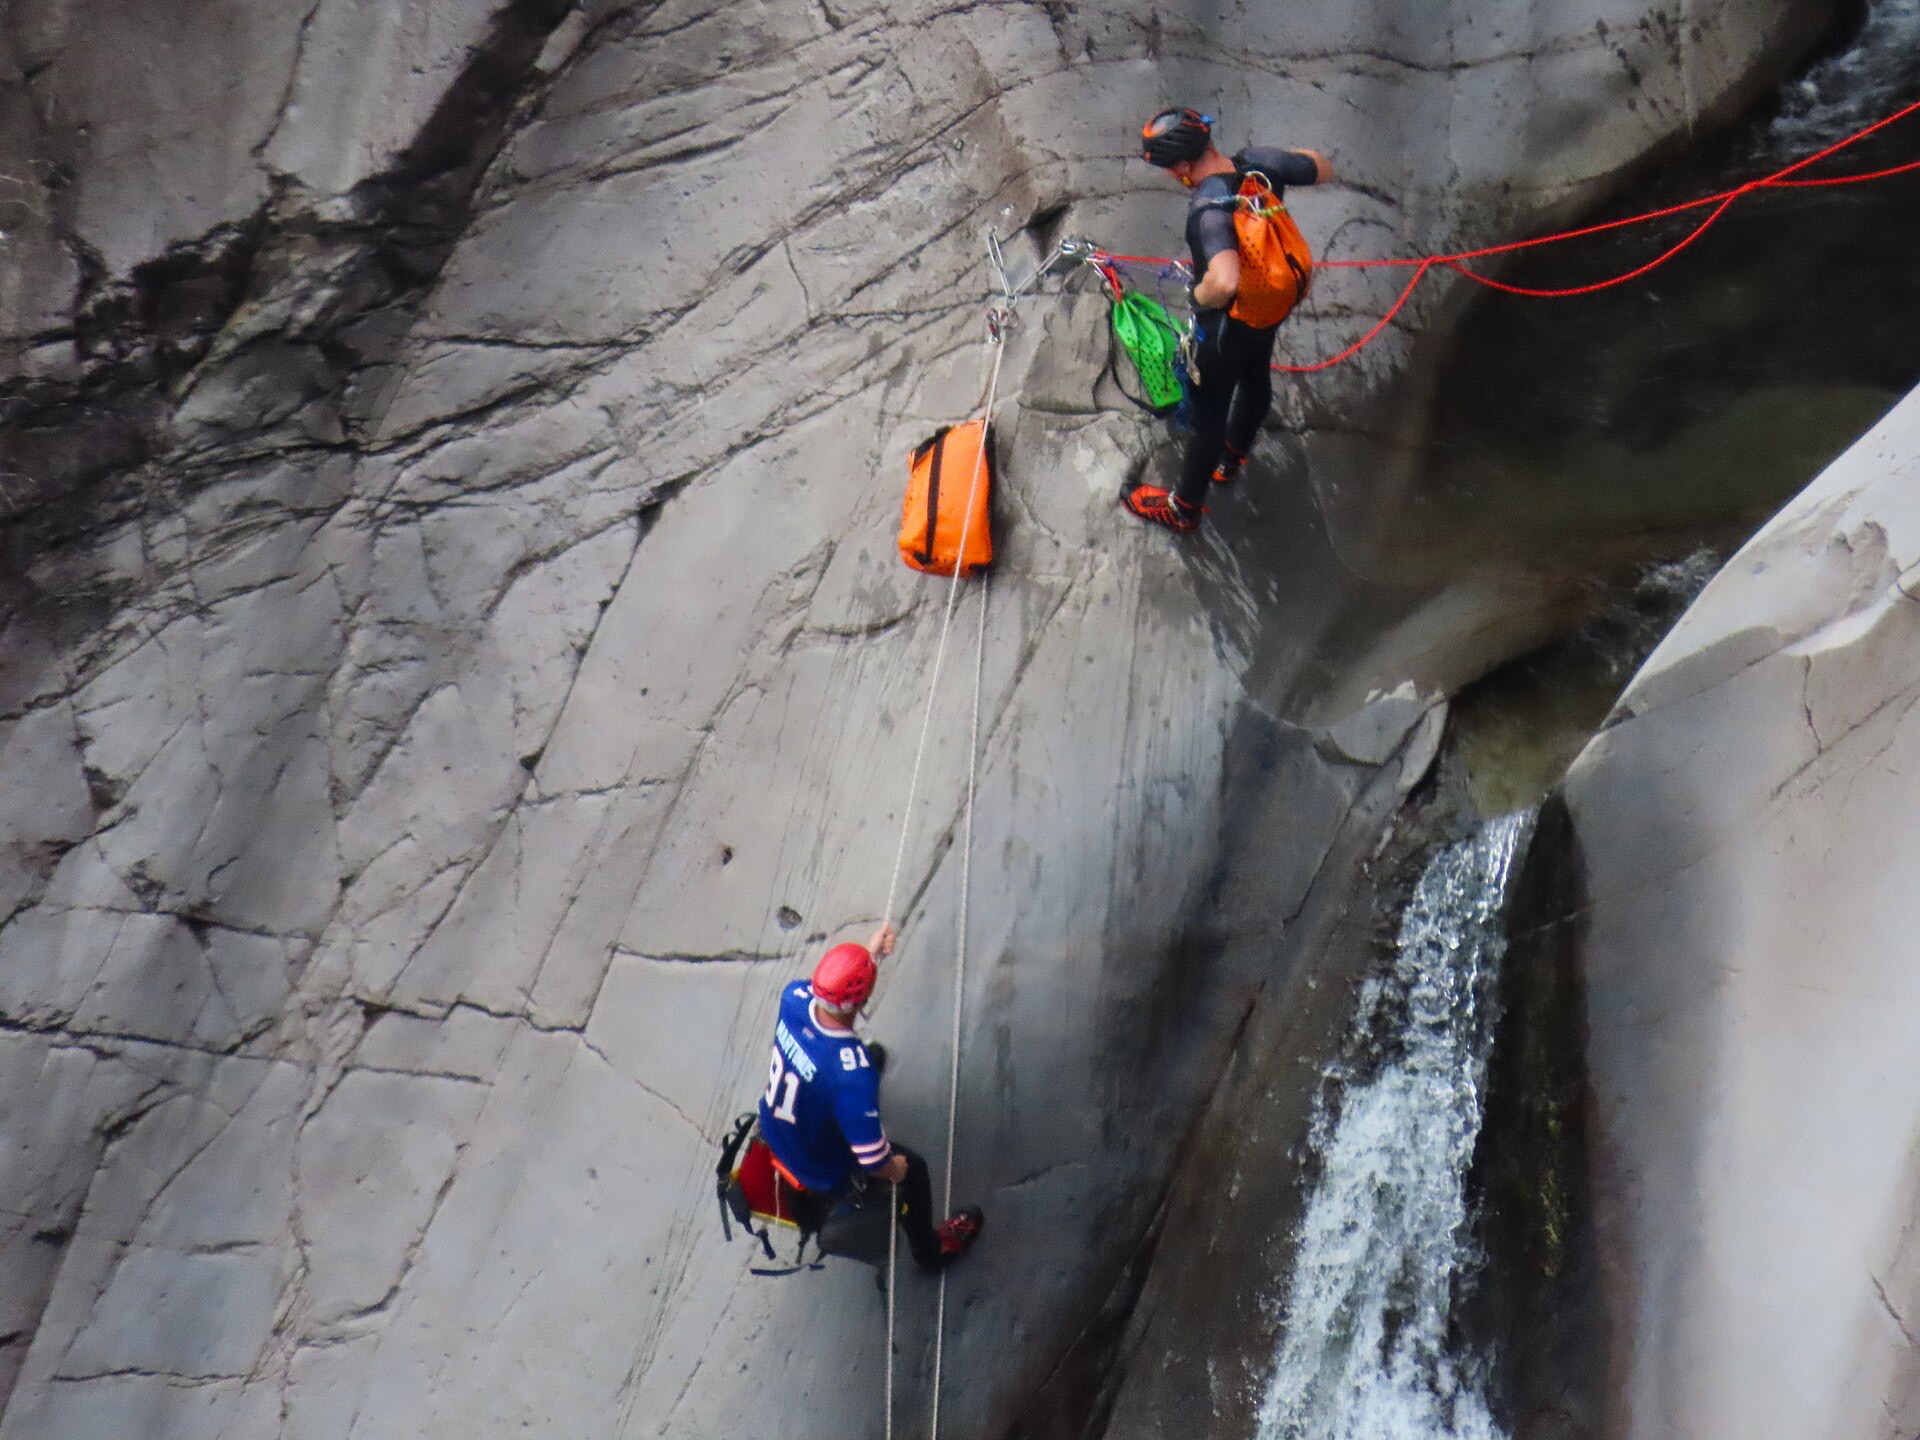
THE CANYONEERING GUIDE
Canyoneering means following a canyon from top to bottom, using whatever it takes to get past each obstacle: walking, wading, scrambling, rappelling, jumping, sliding or swimming. The big difference from hiking or climbing is commitment. Once you pull your rope down after the first rappel, you usually cannot go back up, and many canyons have few or no ways out except the bottom. That is why weather, water levels and rope skills matter so much. Most people start on a guided trip, either a commercial canyoning tour in Europe or a half-day trip in Utah, and then take a rope-skills course before descending canyons with experienced friends.
START HERE
Your first days of canyoneering: the steps, the habits that keep you safe, the gear to get, and the mistakes everyone makes.
GETTING STARTED
A path from your first day.
- 1
Book a Guided Trip
Start with a half-day guided canyon in Zion, Moab, Interlaken, Ticino or Sierra de Guara. The guide provides harness, helmet, wetsuit and rope and shows you how to rappel. It's the quickest way to find out if you like it.
- 2
Learn the Rating System
In the US, a canyon like 3B III means Class 3 (rappels needed), B (still water and swimming), grade III (most of a day). In Europe, v3a3III means vertical 3, aquatic 3, commitment III. Start with Class 3A/3B grade I–II or v1–v3 canyons.
- 3
Take a Rope-Skills Course
An ACA Core Skills (Intro to Canyoneering) course, a Canyoning Institute Level 1 course, or a club course teaches harness setup, rappelling, belaying, simple anchors and rope retrieval. Expect two to three days.
- 4
Buy Personal Gear First
Begin with a helmet, a canyon harness with a seat protector, a canyon descender, locking carabiners, sticky-soled canyon shoes and a draining pack. Ropes and group anchor gear can wait until you lead.
- 5
Join Experienced Partners
Find mentors through ACA meetups, local clubs, Canyoning Australia, RopeWiki or the Coalition of American Canyoneers. Descend many canyons as a team member before you take on leading or rigging.
- 6
Build a Canyon Log
Record each descent: date, rating, water level, anchors and what went wrong. The ACA Aspirant track, for example, asks for 12 canyon descents before assessment. A log also helps you choose the next step.
SAFETY FIRST
The habits that protect you on every outing.
Never Enter a Canyon With Storms in the Forecast
Flash floods are the biggest killer in canyoneering. Rain falling miles away in the drainage can send a wall of water through a dry slot under a blue sky. Check the official forecast (in Zion the NWS issues a flash-flood potential rating), look at the whole drainage, and turn back if the water turns muddy, rises or you hear a roar. In 1999 a flash flood in Switzerland's Saxetenbach Gorge killed 21 people on a commercial trip.
Learn Rope Skills From Qualified Instructors
Rappelling, anchor checks and rope retrieval must be learned in person, not from videos alone. Take a course from the ACA, the Canyoning Institute or a certified guide, and practise on a cliff before relying on the skills in a canyon you cannot climb back out of.
Inspect Every Anchor Before You Trust It
Anchors in canyons are left by previous parties and are damaged by floods, sun and abrasion. Check bolts, webbing and the object it is wrapped around every time. Replace faded or stiff webbing and back up doubtful anchors. Never assume an anchor is fine because others used it.
Dress for Cold Water, Even in the Desert
Pools in shaded slots stay cold all year, and hypothermia has killed canyoneers in Utah. Wear a wetsuit or drysuit sized to the canyon and the season, carry extra layers in a dry bag and keep moving. In arid canyons, carry enough water and avoid midday heat on the approach.
Know the Keeper Potholes and Water Hazards
Some desert potholes are too smooth and deep to climb out of. Flowing canyons hide hydraulics, undercurrents and sieves that can pin a swimmer. Read current route beta before you go, carry the right escape gear, and never jump into water you have not checked for depth and obstacles.
Get the Permit and Leave a Trip Plan
Many canyons need permits: every technical canyon in Zion requires one, booked through Recreation.gov, and group sizes are capped (12 for the Subway, 6 for some canyons). Tell someone your route and when to call for help, and carry a satellite messenger or PLB. The Blue Mountains NPWS lends PLBs free from the Blackheath Heritage Centre.
WHAT TO GET FIRST
Buy the essentials, borrow or rent the rest until you know what you like.
Essentials
- HelmetClimbing-rated (UIAA/CE EN 12492). Rockfall and slips in slick chutes are the most common injuries.
- Canyon harnessWith a butt protector: you sit and slide on rough sandstone. Climbing harnesses wear through fast.
- DescenderA device that lets you add friction mid-rappel on wet, heavy rope (e.g. a figure-8 with ears, Sterling ATS, Petzl Pirana).
- Static or low-stretch canyon ropeLength at least twice the longest drop (or a pull cord). Canyon ropes float and resist abrasion.
- Locking carabiners + personal anchorA cow's tail / tether to clip into anchors at the edge of every drop.
- Wetsuit or drysuitEven desert slots hold cold pools; 3–5 mm for most wet canyons. Hypothermia is a real risk in summer.
- Canyon shoesSticky, draining shoes with a firm sole (e.g. Five Ten Canyoneer, Bestard). Not trail runners with mesh that shreds.
- Dry bags / canyon packA draining pack and a keg or dry bag for food, layers, first aid and phone.
- Weather and flash-flood forecastCheck the NWS flash-flood potential for the canyon's whole drainage the morning you go. Rain miles away can flood a slot.
Add as you go
- Webbing, rapid links and a knifeTo replace worn anchors and cut a jammed rope or tangled clothing in an emergency.
- Ascenders / prusiksTo climb back up a rope if a rappel goes wrong.
- Satellite messengerSlots have no phone signal (e.g. Garmin inReach, Zoleo).
ANATOMY OF A CANYONEERING KIT
A real canyoneer, labelled, a diagram of the rope gear, and the rest of the kit in the lists below. Tap a number to see what each part does, the options and how to choose. This is a gear guide, not a how-to: learn rope work, anchors and rappelling on a course with a certified guide (for example the American Canyoneering Association) before your first technical canyon.
Helmet
Rockfall, a slip in a slick chute or a swing into the wall on rappel: a helmet is worn for the whole canyon, not just the drops. Canyon helmets are climbing helmets (EN 12492 / UIAA 106) with drain holes and no foam that soaks up water.
- Hard-shell (ABS) climbing helmetabout 300–400 gCanyons: survives being dropped, sat on and packed; the usual choice
- Hybrid (shell + EPS foam)about 250–330 gDry slots and long approaches; lighter, dents more easily
- Foam-only (EPS/EPP)about 180–250 gAlpine climbing; too fragile for tight slots
Descender
The rappel device clipped to the harness. Canyon descenders are built for wet, muddy and heavy rope, and most offer more than one friction setting.
- Figure-8 with earse.g. Petzl Pirana, Kong Hydrobot; 8–11 mm ropeEuropean aquatic canyons: quick to rig, several friction modes
- Variable-friction platee.g. Sterling ATS, CRITR, TotemUS slots and long rappels; easy to lock off
- Rappel rack4–6 barsVery long or heavy-load rappels
- Tube / belay deviceclimbing ATCDry, short rappels; little friction control and twists the rope less
How to choose: Check the rope diameter range printed on the device, and learn to use it with an instructor before a canyon.
Personal tether (cow's tail)
A short leash from the harness with a locking carabiner on the end (a "cow's tail"). Usually made from dynamic rope, sometimes with two legs of different lengths.
- Dynamic-rope cow's tailabout 9.5–11 mm dynamic rope, 40–70 cmMost canyoneers: absorbs a short fall onto the anchor
- Two-leg tethershort + long legTraverses and guided lines
How to choose: Choose one made of dynamic rope, and learn how and when to use it on a course.
Canyon rope
Canyon ropes are static or low-stretch (under about 2–5% at body weight), so you don't bounce on long drops, often with a thick sheath for abrasion. Many float, which keeps them out of underwater snags.
- Thin canyon rope8–8.5 mm (e.g. Imlay Canyon Fire 8.3 mm)Light kit for experienced teams; needs a descender rated for thin rope
- Standard canyon rope9–10 mm (e.g. Sterling C-IV 9 mm, Imlay Canyonero 9.2 mm)Beginners and groups: more friction, more durable
- Lengths30 m, 45–60 m, 70–90 mMatch the longest drop: short slots, typical Zion canyons, big alpine canyons
- Dynamic climbing ropestretches 30%+ when loadedAvoid: bounces and saws over edges
How to choose: Ask the canyon description or a local guide what length the canyon needs, and learn rope work on a course before you use one.
Knife
A rescue knife with a protected or hooked blade, carried on the harness or a shoulder strap where either hand can reach it.
- Rescue knifeblade about 5–8 cm, one-hand opening, blunt tipMost canyoneers
- Fixed-blade in a sheathshort, locking sheathAquatic canyons where you need it fast
How to choose: Choose one you can open with one wet, gloved hand.
Whistle
Voices don't carry over a waterfall. Teams agree signals before the first rappel (for example 1 blast = stop, 2 = rope free / come down, 3 = help).
- Pea-less whistleplastic, works when wet, 100+ dBClipped to the harness or pack strap
First aid and emergency kit
Help can be many hours away. A group kit in a dry bag or keg covers sprains, cuts and cold, plus an emergency blanket and a way to make warmth.
- Group first aid kitelastic bandage, tape, dressings, splint, painkillersOne per group, waterproofed
- Emergency blanket / bivy50–150 gKeeping an injured person warm
- Headlampwaterproof (IPX7+), spare batteriesEvery person; canyons often take longer than planned
How to choose: Take a wilderness first aid course. Hypothermia and ankle injuries are the common problems.
Satellite messenger or PLB
Canyons have no phone signal. A satellite messenger (e.g. Garmin inReach, Zoleo) sends SOS and text messages; a personal locator beacon (PLB) only sends SOS but needs no subscription. Both need a view of the sky, so climb out of the slot or move to an open spot to send.
- Two-way satellite messengerSOS + texting, subscriptionLetting rescuers know what's wrong
- PLB406 MHz SOS only, no subscriptionBackup or budget option
Flash-flood forecast
The most important piece of safety kit isn't carried: rain anywhere in the drainage, even many miles away, can flood a slot under a blue sky. Check the official forecast the morning you go, for the whole catchment.
- NWS Flash Flood Potential (US Southwest)probable / expected ratings for Zion and southern UtahUtah and Arizona slots
- River flow gaugese.g. CFS at a USGS gaugeFlowing canyons; Zion's Narrows closes above 150 CFS
- Local forecast and ranger stationday-of checkEverywhere else
How to choose: If storms are forecast for the drainage, choose another day. In the canyon, turn back or climb high if the water rises, turns muddy, carries debris or you hear a roar.
KIT FOR THREE KINDS OF CANYON
- Dry desert slot
- Utah slots, e.g. Little Wild Horse, Egypt slots
- Wet / aquatic canyon
- Zion Subway, Mystery; Spain's Sierra de Guara
- Alpine canyon
- Ticino and Valais (Switzerland), French Alps
- Dry desert slot
- Clothes you can shred, maybe a 3 mm shorty for potholes
- Wet / aquatic canyon
- 3–5 mm full wetsuit, neoprene socks
- Alpine canyon
- 5 mm two-piece suit (7–10 mm torso), hood and gloves
- Dry desert slot
- Short ropes, 30–60 m; abrasion-resistant
- Wet / aquatic canyon
- Floating 9–10 mm, 45–60 m
- Alpine canyon
- Floating 9–10 mm, often 2 × 60–90 m
- Dry desert slot
- Tough abrasion-resistant pack, 30–45 L
- Wet / aquatic canyon
- Draining pack + keg
- Alpine canyon
- Draining pack + keg, 45–60 L
- Dry desert slot
- Pothole escape kit, lots of water, sun protection
- Wet / aquatic canyon
- Contingency rigging, knife on harness
- Alpine canyon
- Contingency rigging, throw bag, knife, hydraulics training
- Dry desert slot
- Flash floods, keeper potholes, heat
- Wet / aquatic canyon
- Cold water, hypothermia, flash floods
- Alpine canyon
- Hydraulics, cold, high flow after rain or snowmelt
Every canyon is different: read its beta (longest rappel, water, escapes) and check flow and the flash-flood forecast the morning you go.
Typical ranges, checked 2026-11-13; check the maker's spec for a given model.
COMMON MISTAKES
Every new canyoneering beginner makes these.
Ignoring the weather because the sky is clear overhead
Flash floods come from rain anywhere in the drainage. Check the forecast for the whole catchment, have a plan for high ground and do not enter narrow slots when storms are possible.
Underestimating cold water
Bring a wetsuit or drysuit matched to the canyon's current water temperature, not the air temperature. Shaded pools can be dangerously cold even in summer.
Starting late and rappelling in the dark
Use the grade (I–VI) to plan; parties new to the sport should allow 50–100% more time than the book. Start early and carry headlamps.
Trusting old webbing without checking it
Inspect every anchor. Carry spare webbing and quick links and replace anything faded, stiff or cut.
Jumping without checking the pool
Have the first person rappel or downclimb to check depth and look for submerged rocks and logs before anyone jumps. Pools change after every flood.
Pulling the rope before confirming the next section
Make sure the rope will pull freely and the canyon below is passable for the group before the last person commits. Once the rope is down, retreat is usually impossible.
LEVEL UP
You can rappel and you have done a few canyons with a guide or friends. The next steps are learning to rig anchors, handle water and get your group out of trouble. Progress in canyoneering is about judgement more than strength: each step up in rating adds commitment, and mistakes far from help are hard to fix.
SKILLS BY LEVEL
6 skills from foundation to expert. Open one for its sub-skills and drills.
MILESTONES
Know where you stand, and what to aim for next.
Beginner → Intermediate
- Rappel smoothly with a pack, single strand
- Inspect anchors and spot bad webbing
- Rig a retrievable rappel under supervision
- Swim cold pools with a pack
- Complete several 3B II–III canyons
Intermediate → Advanced
- Build natural anchors from scratch
- Set up releasable rigging
- Free a stuck rappeller safely
- Lead grade III–IV canyons
- Handle moderate flow (C1–C2 / a4)
Advanced → Expert
- Lead Class 4 canyons with potholes
- Run grade V–VI descents
- Rig in strong current
- Manage a rescue far from help
- Mentor or guide others
TRAINING PHASES
Each phase builds on the last. Repeat the cycle to break through plateaus.
Rope Foundations
Weeks 1–4
Safe rappelling and personal gear
- Take a 2–3 day rope-skills course
- Practise rappels and lock-offs on a cliff weekly
- Learn the ACA and French rating systems
- Do one easy guided or mentored canyon
Team Member
Weeks 5–12
Anchors, water and canyon flow
- Descend Class 3A–3B grade I–II canyons with mentors
- Inspect and discuss every anchor
- Practise rope retrieval and stuck-rope fixes
- Swim pools with a full pack
Rigging & Rescue
Weeks 13–24
Rigging under supervision and basic rescue
- Rig rappels while a mentor checks
- Practise releasable rigging and converting to a lower
- Take wilderness first aid
- Do a grade III canyon start to finish
Leading
Season 2+
Leading friends and harder canyons
- Lead familiar canyons with strong partners
- Add one new skill per season (potholes, swiftwater, long rappels)
- Consider an ACA Aspirant assessment or Canyoning Institute Level 2
- Mentor a newer canyoneer
DISCIPLINES
Where riders go from here. Tap a branch to see how people get into it.
Most people start on a guided trip, then take a rope-skills course. From there the sport splits: dry desert slots with potholes and squeezes, flowing European-style canyons that lead to alpine, tropical and swiftwater descents, and a leadership track toward canyon leader and professional guide. Tap a branch to see what it takes and what comes next.
Sources: Wikipedia: Canyoning (names, regions, hazards, training bodies) · ACA: Canyoneering curriculum · ACA: Canyon Leader certification · Canyoning Institute: certification pathway · Tom's Utah Canyoneering Guide: ACA rating system · FFME: canyon grading system (v/a/I–VI) · Descente-Canyon: Trou de Fer, Fleurs Jaunes, Iragna grades · NPS: Zion canyoneering permits
GRADES & DIFFICULTY
Each row is one grading system, the way it looks on the trail. Read down a column to convert. Pick a level to see the terrain.
- ACAUSA1–2 · A
- FFME/FFSEuropev1–v2 a1–a2
Pick a level to see what canyoneering terrain looks like there.
GLOSSARY
- Rappel (abseil)
- Descending a rope while controlling speed with friction from a descender
- Anchor
- The point a rappel rope is attached to: bolts, a tree, a boulder, webbing around a chockstone or a constructed anchor
- Retrievable rigging
- Setting the rope so it can be pulled down from below after the last person rappels, leaving little or nothing behind
- Releasable (contingency) rigging
- A rope system that can be lowered from the top if someone gets stuck on rappel, especially in waterfalls
- Meat anchor
- Using one or more people as the anchor for a short drop or the first person down
- Keeper pothole
- A water-carved pit with smooth walls that you cannot climb out of without special techniques
- Pothole escape
- Getting out of a keeper using partner assists, hooks or a sand-filled bag thrown over the lip as a counterweight
- Stemming
- Bridging a narrow slot with feet and hands or back on opposite walls, often high above the floor
- Downclimb
- Climbing down a drop without a rope, often with a spotter or partner assist
- Chockstone
- A boulder or log wedged between canyon walls; can be an anchor or a hazard
- Flash flood
- A sudden rise in water from rain falling anywhere in the drainage, sometimes many miles away
- Hydraulic
- Recirculating water below a drop that can hold a swimmer under
- Sieve (strainer)
- A gap between rocks or logs that lets water through but can trap a person
- Beta
- Route information: rappel lengths, anchors, water levels and escape points
- CFS
- Cubic feet per second, the flow measure used for US rivers; Zion closes the Narrows above 150 CFS
- ACA rating
- US grade such as 3B III: technical class (1–4), water (A–C), time (I–VI), plus optional R or X for extra risk
- French rating
- European grade such as v4a3III: vertical difficulty (v1–v7), aquatic difficulty (a1–a7) and commitment (I–VI)
LEARN MORE
GO DESCEND.
Find a spot near you, plan a trip, or see who's who in canyoneering.